|
Cameras
|
 |
|
1080P HD Keychain Camera - Mate 808 HD 70° and 120° Lens
|
|
| Specifications | |
| Camera Specs | |
| Basic Operation | |
|
Power Button: Power
On/Off - Mode Selector Shutter Button: Start/Stop Video - Photo Snapshot
Holding the power button for 3 seconds starts or
shuts off camera.
|
|
| Camera Drive | |
| When connecting the camera using the USB cable for the first time a box will pop up "installing drivers" which are the USB mass storage device and video camera USB device. A new drive will be listed on your pc, as example: Removable Disk (J;) | |
| Pictures and Videos | |
|
720P JPEG
Picture Size about 641 KB each 1080P JPEG Picture Size about 1281 MB each Videos 1920x1080P or 1280x720P 30 FPS .AVI 30 minutes of 1080P video = 4GB All media files will be saved to the "VIDEO/PICTURES folder on the camera drive. Right click any of the media files you created in the folder for options like Cut, Copy, Paste, Delete. What I do is highlight all media (or edit, select all), cut and paste them to a folder on my pc, this removes them off camera SD card and saves them to pc. |
|
| Charging | |
|
USB takes about
70 minutes to fully charge if the battery is completely empty. When charging the (red light) will remain solid, when fully charged the light will shut off. This cam can do up to 90 minutes of video on full charge. Note: There are 4 cables for this camera.
The RCA cable with red & yellow A/V
out ends used for TV. |
|
| Movie Maker 6 for Win 7 | |
|
Windows
live movie maker that shipped with windows 7 is more of a down graded movie maker
6. For those who want the better movie maker 6 for win7 -64 bit edition you
can download it
here, download also includes K-lite codec pack 64 bit. See how to:
video
PIP Using Movie
Maker 6 |
|
| SD Cards | |
|
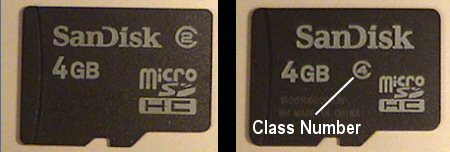
SD cards range from 2-32 GB. The cards used are the Micro SD/TF/SDHC with storage space 4GB/8GB/16GB/32GB. Tip: TF = TransFlash, SDHC = Secure Digital High Capacity. Your local computer store may sell these cards but you will probably find them cheaper online. The higher the class number (2, 4, 6...) the faster the read/write speed. Transcend, Kinston, and SanDisk are popular brands. Class numbers will be circled, see pic below.
Class is the rate in
which data flows to and from the card. When inserting
the SD card the brass pins on card will face towards top of camera. Note: Class 10 recommended for the Mate 808. |
|
| Configuration | |
| Basic Settings and How They Work here | |
| In Camera Formatting | |
|
With
camera in standby mode (solid led) press and hold the shutter button for 10
seconds, the red led will blink 3 times. Note: This will erase everything on SD card! |
|
| WebCam Mode | |
| Plug in USB and turn camera off (charging mode) if this is the first time using webcam mode drivers will load. If you dont have the Amcap program you can download it here. Open "Amcap.exe" to view the live capture from camera.. | |
| Original Manual | |
| Original manual that comes with camera. | |
| Firmware | |
|
Last firmware update Sept 2016 |
|
| Configuration Software | |
|
Windows software to configure
settings using USB connection. Ez_Configuration |
|
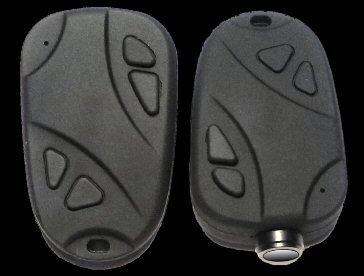
| Inside the Mate 808 1080P | |
| Take a closer look at the internal parts of the Mate 808 HD 1080P | |
| Pros / Cons | |
|
Pros: Sharp clear audio/video. Uses 5 pin micro USB 2.0. Battery and lens use a plug-in type connector for ez replacement. Using the configuration Text File or (GUI) you can create your own settings. You can also view videos and pictures directly from camera to TV using A/V cable or USB. Cons:
Pointing the camera towards sun, the sky will wash out or turn blue green.
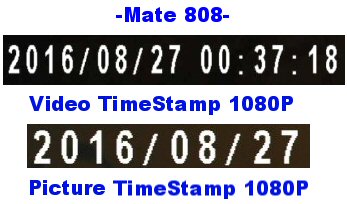
This is what the time stamp looks like on my Mate 808 1080P HD cam.
|
|
| . . |