|
|
|||
|
|||
Making a 2K Fun/Stryker |
||||||
Stryker
Basics 2K Fun Stryker Build |
To start this project you will
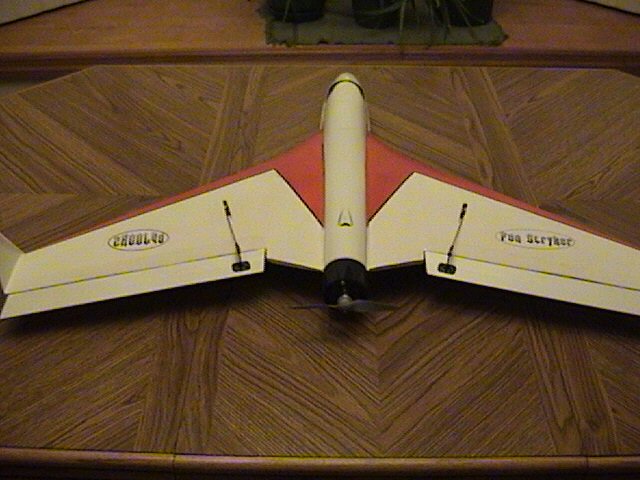
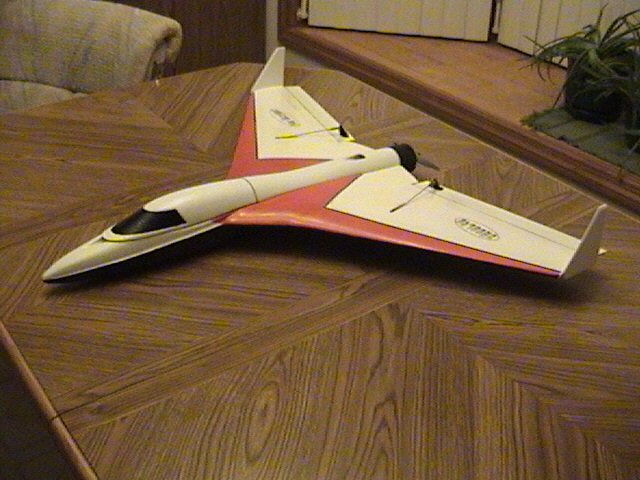
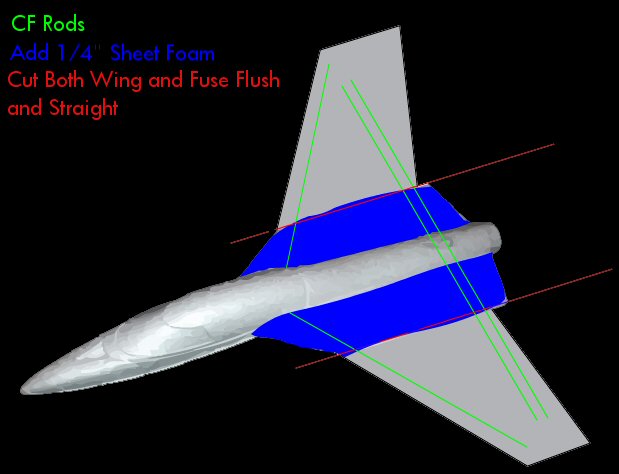
need: Tip: Its very important to keep all cuts straight and level or you will have problems later when attaching wings. On the Fun Jet fuse you will need to cut off the wing edge where the wings attach removing the wing joints for a flat surface. I layed a small level on top fuse to make sure it stays level while sawing, keeping the saw straight and level as I cut off the ends. On the Stryker just cut off wings close to fuse. At this point you can size it up and decide on the length of the wings you want to add and make the final cuts straight and level on flat surface. The top of stryker wings will be about a 1/4" taller than FJ wings, this is where you add the 1/4" thick sheet foam to fill in space between fuse and wings as shown in the blue area in picture above. Attaching wings to fuse I found it easier to put the wing of the FJ fuse (bottom of the short wings) so it sits flat on table top, the fuse body will hang over edge of table. This keeps wing level (flat) while lining up the front leading edges, also gives you a good idea how straight your wing cuts are. Where the wings join together there should be no gaps, gaps are crooked cuts. Slight gaps can be sanded using a sanding block to straighten them. After gluing the wings in place cut channels for 2 rear CF rods. The old FG rod channels on stryker wings should be continued into the FJ fuse then glue in CF rods. After the CF rods are in its time to glue the sheet of foam between fuse and stryker wings to fill the gap, Once everything was filled and sanded into shaped I started glassing. I glassed top and bottom of plane then painted it. Final thoughts: The point I cut the wings off stryker I should have left the vertical fin channels intact to use the stock stryker fins instead of winglets. It would have been much easier that way. Live and learn :) The 2K Fun Stryker is complete.
|
|||||
Contact
© 2005-2014 2KOOL4U.com


